Tuesday, January 31, 2012

Building Wood Sink Vanity


Now that the floor is complete in the bathroom we have started working on the actual sink unit. It will look a little different than the mockup that we made a couple weeks ago. The first thing that you see is that the front has the space for the three drawers. The two side drawers will be false and the center one will be true.

You can also see that the side has an additional piece that fits behind the back leg. This is to make sure that the unit will butt up flush up against the wall with the new baseboard. There is still some trimming that will need to take place to allow the sinks to drop in but it is getting closer.

Wednesday, January 25, 2012

Crown Molding

 Added crown molding to the baby room - still needs to be painted. We're working on the baseboard next.

Saturday, January 21, 2012

Bathroom Floor - Planing, sanding and first coat of urethane


 So staying true to the old nature of our house, we decided to hand plane the floors... Actually, the space was just too small to justify renting a commercial sander. The planing worked very well at taking down the uneven boards. Luckily, the flooring we laid had never been refinished even though it is over 100 years old so we have a lot of thickness to work with and Tyler was very careful in laying it so the boards were pretty even to start with.


Once the boards were fairly even, he went over the whole thing with a sander, taking the stain off the newer flooring and smoothing things out.

And then it was time to put the first coat of urethane on - it soaks up and dries quickly and the floor will get darker and redder with every coat. I think it will be a nice color match to the existing flooring.

Stariwell - removing the bump out and doing baseboard

We were deciding how to finish the stair trim because the wall at the landing had a very strange bump out, you can see it in the far left side of the picture above. Finally, Tyler decided to just cut into it and see why it was like that, figuring that there was a duct or beam there. It turns out that the downstairs is built with old true 2x4's (2" by 4") while the newer wall upstairs was built with new 2x4's (1.5" by 3.5") and the person who did the work just left it looking strange instead of accounting for the difference. So, we had a 1/2" bump out to deal with.
 As you can see above, the old true 2x4's were cut down so the new drywall could be flush.
 It then was patched, textured, and painted.
 Doing the trim along the stairs was a little tricky but the board was cut to fit and put in place.
 The top trim was then added. Things still need to be caulked, filled, sanded, and painted but it looks much better then before.

Tuesday, January 17, 2012

Snow Storm

 
 We got quite a bit of snow (for us) over the last couple of days. It is nice to see everything with a white coating. Since there are no plows or any other snow handling equipment everything shuts down. We'll see what the rest of the week has in store for us.


Sunday, January 15, 2012

Laying bathroom wood flooring

This weekend we installed the fir flooring in the bathroom. The first step was to remove all of the previous plywood and linoleum flooring. You can see in this picture that most of the old floor has been removed and there is still one strip along the tub. You can also see where the toilet was taken out and the air vent is located.
 The next step was to remove the strip of plywood right up to the tub face. This was a time consuming process with the chisel. The new floor will go right up under the front face of the tub.
All of the old floor has been removed and cleaned up. You can see some of the original ship lapped 1" thick fir subfloor. At one point when the bathroom was added one section or subfloor was replaced with plywood.
To help finish the edge a single piece of flooring is fitted along the face of the tub. This will help getting all of the ends to finish well. This piece looks like a different color because it was sanded before it was put in place. 
At this point we ran out of flooring. I thought that we had enough but we were not even close. Kristen and I went down to the Seattle Restore and picked up some more on Sunday. Obviously the vent has been recut in this picture and the new cover has been put on.
New (old) flooring purchased, and kept laying.
 Trimming the pieces around the toilet flange.
 All finished up now. Just needs some sanding and a couple coats of urethane.
 

Upstairs Bathroom Plumbing Moved

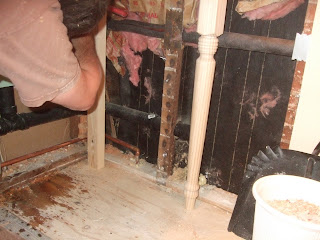
 Our bathroom used to have one very small sink in the corner so we had to move the plumbing to another wall and set it up for two sinks. First step was cutting off the drywall and the top layer of linoleum and plywood.
 Once everything was unhooked and opened up, the pipes we rerouted through the studs in the adjacent wall with a little pitch so it will drain.
 The water was turned back on and we had a minor leak the first time at the decorative chrome pipe that sticks out so we had to reseal it. We still need to move the electrical but it is nice to have a functioning sink in the bathroom. We also need to patch the drywall but we'll do this after all the electrical work is complete.

Wednesday, January 4, 2012

Bathroom Vanity Mockup

On Monday afternoon we worked on the design for a new bathroom vanity. We were not sure if we would be able to get two sinks into the unit and still keep it small for the bathroom. Eventually it will be pushed in a little further so that it is up against the wall. There are some little things that we are going to change when we make the real one but at least we know that it will work in the space. The top will eventually be granite and the base will be paint grade (poplar). The front looks a little blank right now but there will eventually be three drawers on this face.
 
Once it is slid against the walls we will also have to relocate some of the outlets and drains.
Here is a picture of the other side of the bath showing the louvered doors sitting in place over the closet.